Pots of gold, shamrocks, and rainbows are symbols of St. Patrick’s Day that are ripe with learning material. Kick your St. Patrick’s Day celebration up a notch with these fun preschool math activities.
Fill Your Pot of Gold
For this game, you will need the following:
- one pot cutout for each child
- gold coin cutouts OR coin chocolates
- dice
Place a pile of gold coins in the center of the table and offer each child a pot. Start with the youngest player and have her roll the dice. She should count up the dots and place that many coins on her pot. Repeat with each child and continue playing until all of the coins have been used up. You may want to play with a single die, depending on how high the children can count, or to extend the timing of the game.
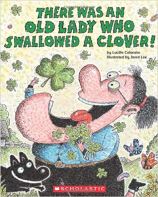
Read There Was An Old Lady Who Swallowed a Clover by Lucille Colandro
There Was An Old Lady Who Swallowed a Clover is a cumulative story or a story that builds a pattern. Locate a copy of it at your local library and read it to the children (or listen to it online). Try some of these follow-up activities:
- Count the number of items the Old Lady swallows.
- Help children map the pattern. Ask, “Why does the Old Lady continue to swallow item after item?”
- What is the result of adding the items together?
Sort Clovers with a Carroll Diagram
A Carroll Diagram is a two-way table that helps children sort items in a yes/no fashion. For this activity, cut a variety of shamrocks and four-leaf clovers, making some with stems and some without. Create the diagram on a piece of poster board. Label the left column “Shamrocks” and the right column “Four-leaf clovers.” Label the top row “With a stem” and the bottom row “Without a stem.”
Start by asking a child to choose a clover and decide whether it is a shamrock or a four-leaf clover. Have him place it in the correct column. Once the children have correctly placed the clovers, invite them to decide if the clover can stay in the top row (because it has a stem) or if it has to be moved to the bottom row (because it doesn’t have a stem). Continue sorting until all of the clovers have been placed in the correct spots.
Make a Rainbow Glyph
Glyphs are visual representations of data. Depending on the content, they can also be great ways to learn about the children in your setting. Making glyphs requires children to slow down and listen. They also support simple sorting skills.
To make the following glyph, you will need:
- white paper
- large sheets of construction paper
- glue stick
- markers and crayons
- Glyph Key printout
- scissors
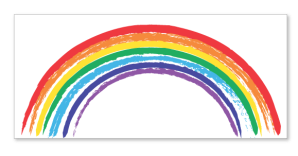
Invite the children to sit at a table and offer each child a piece of white paper. Place the markers and crayons in the middle of the table where everyone can reach them. Explain to the children that you will be reading different prompts to them, and they will draw each part of a rainbow using markers or crayons, depending on their answers. Begin the activity by reading step 1 from the Glyph Key.
Glyph Key
| Steps |
Prompt |
| Step 1: Red |
If you like the spring, draw a red arc using a marker. If not, draw it using a crayon. |
| Step 2: Orange |
If you have ever found a four-leaf clover, draw an orange arc using a marker. If not, draw it using a crayon. |
| Step 3: Yellow |
If you’d like to meet a leprechaun, draw a yellow arc using a marker. If not, draw a it using a crayon. |
| Step 4: Green |
If you like the color green, draw a green arc using a marker. If not, draw it using a crayon. |
| Step 5: Light Blue |
If you have been to a St. Patrick’s Day parade, draw a light blue arc using a marker. If not, draw it using a crayon. |
| Step 6: Dark Blue |
If you have seen a rainbow, draw a dark blue arc using a marker. If not, draw it using a crayon. |
| Step 7: Purple |
If you like St. Patrick’s Day, draw a purple arc using a marker. If not, draw it using a crayon. |
Once everyone has completed their rainbows, talk with children about their answers. Give them time to compare rainbows. They may want to embellish their pictures with clouds, a sun, or other details. When they are finished, ask children to write their names on their papers and then frame them by gluing the rainbow pictures to large pieces of construction paper (trim as needed). Post them on a wall in your setting with a printout of the key nearby so families can observe and appreciate the children’s work.
Back to blog listing